All enemies including bosses will automatically improve in quality in relation to your Captain's experience level and the game difficulty setting. The stats (enemy level, health, move, armour, armour deflection, attack range, maximum attack damage(s) including penetration and any status ailments [skill symbol(s)] ) of any enemy can be found by selecting them. The only way to obtain any form of enemy attack or defence skill ratings and thereby see how dangerous an enemy is in combat is to open up the combat log.
The limitation to accessing an enemies stats is that they must be: within visual range of a templar/engineer's turret/allied tact point; or the map area has been recently scanned by a sensor kit, as indicated by the brightness of the floor tile. Dull floor tiles will only allow you to attack enemies at long range and see their maneuvers.
Enemy that are hidden by a black floor tile can only be attacked if: the area is covered by overwatch and the overwatch attack is activated; a flame attack extends into an unseen area or they are standing behind a visible enemy who is hit by AoE attacks, the likes of Burst Fire or Full Auto.
Note: all damages and stats quoted are taken from the enemy summary available during a mission; the damage listed being the maximum possible damage per hit for a non-critical hit. For the full damage range, please see the combat log in mission.
Terrox Xeno[ | ]
An alien race with a natural tendency to be resilient to the rigours of space travel and highly aggressive towards other species, who were also experimented upon by the Narvidians in the past. These experiments resulted in new species being added to the Terrox race, however both natural & artificially created were found to be too hard to reliably control by the Narvidians. Unfortunately this has not stopped various xenos worshiping cults from attempting to do what the Narvidians failed at. They are the primary antagonists of the game, being encountered in over 80% of the missions.

Scittering[ | ]
A small highly mobile enemy, that has a tendency to attack in a swarm where possible. Is the weakest Terrox enemy you'll face. Has only 6MP when lower level.
Level 13 profile: 77HP, 8MP, 18 Arm, 39% Def, Rng 1, 60 Dmg 13% Pen.
Radiated Scittering[ | ]
A Scittering that deals additional damage as radiation, and has resistance to plasma based damage. It is distinguished by its green back. Has only 6MP when lower level.
Level 13 profile: 77HP, 8MP, 18 Arm, 39% Def, Rng 1, 60 Dmg 13% Pen, 40 Rad Dmg, 35 Plasma Res.
Broodmother[ | ]
A creature that can move, attack in melee and can spawn 1-2 regular Scittering per turn. Its preferred option is to act as a mobile spawn point, over charging a templar to engage in melee combat.
Level 13 profile: 190HP, 5MP, 25 Arm, 48% Def, Rng 1, 50 Dmg 13% Pen.
Radiation Brood[ | ]
A Broodmother that deals additional damage via radiation, has resistance to plasma based damage and spawns Radiated Scittering. It can not spawn regular scittering, and is distinguished by its green back.
Level 13 profile: 190HP, 5MP, 25 Arm, 48% Def, Rng 1, 50 Dmg 13% Pen, 30 Rad Dmg, 30 Plasma Res.
Brood Lancer[ | ]
A Radiation Broodmother that shoots projectiles at a templar. The projectiles will then spawn a Radiated Scittering in a tile near to their target. If there are no templar in range it can spawn Scitterings in the conventional manner. Has a reduced health pool to compensate for its ability to launch radiated Scitterings safely past any areas covered by overwatch/flamed floor tiles. It is distinguished by its red back.
Level 13 profile: 103HP, 5MP, 26 Arm, 71% Def, Rng 6, 70 Dmg 45% Pen, 24 Rad Dmg
Spitter[ | ]
The basic ranged unit of the Terrox, with a medium ranged projectile that deals physical & radiation damage.
Level 13 profile: 105HP, 5MP, 26 Arm, 71% Def, Rng 5, 70 Dmg 51% Pen. 24 Rad Dmg.
Lancer[ | ]
A Spitter with enhanced range, but with a minor reduction in its ability to penetrate armour.
Level 13 profile: 106HP, 5MP, 26 Arm, 71% Def, Rng 7, 70 Dmg 45% Pen. 24 Rad Dmg.
Carapace[ | ]
A Spitter that has undergone a range and damage reduction in favour of survivability.
Level 13 profile: 149 HP, 5MP, 61 Arm, 110% Def, Rng 2, 70 Dmg 32% Pen.
Magma Carapace[ | ]
A Carapace with minor range improvement, high resistance to fire damage and mild resistance to plasma.
Level 13 profile: 149 HP, 5MP, 61 Arm, 110% Def, Rng 3, 70 Dmg 32% Pen. 60 Fire Res, 16 Plasma Res.
Tusk Carapace[ | ]
A Carapace that has surrendered its range attack in order to deal greater melee damage.
Level XX profile:
Hunter[ | ]
Arguably the iconic enemy of the game, due to its prevalence in earlier missions combined with a stat profile not out of place on a templar. It deals respectable melee damage and can withstand multiple leviathan rifle hits.
Level 13 profile: 123HP, 5MP, 33 Arm, 78% Def, Rng 1, 80 Dmg 26% Pen.
Plated Hunter[ | ]
Is a hunter with enhanced armour, making for a more durable opponent.
Level 13 profile: 123HP, 5MP, 41 Arm, 98% Def, Rng 1, 80 Dmg 26% Pen.
Predator[ | ]
A Hunter with improved movement and damage range at the cost of reduced armour. Its ability to quickly take down a templar if given the chance to get close makes it a priority target over other hunters.
Level 13 profile: 141HP, 6MP, 26 Arm, 70% Def, Rng 1, 100 Dmg 31% Pen.
Goliath[ | ]
A large, deadly and ominous Terrox, that can absorb lots of damage with its sizeable health pool, armour and deflection comparable to that of a Carapace and a strong melee attack that can easily penetrate most templar armour.
Level 13 profile: 235HP, 5MP, 47 Arm, 112% Def, Rng 1, 110 Dmg 44% Pen.
Siege Goliath[ | ]
A Goliath with a greatly enhanced health pool, and moderate improvement to its attack penetration.
Level 13 profile: 325HP, 5MP, 47 Arm, 112% Def, Rng 1, 110 Dmg 57% Pen.
Spined Goltank[ | ]
Possibly the deadliest melee Terrox in game, having a deflection that almost guarantees armour soak, an attack that can be relied upon to bypass armour on a regular basis as well as gaining radiation damage.
Level 13 profile: 310HP, 5MP, 50 Arm, 190% Def, Rng 1, 110 Dmg 73% Pen. 48 Rad Dmg.
Litch[ | ]
The most lethal of all the ranged units in the Terrox race, given its ability to penetrate all armour with ease; It has an appearance similar to that of a Hunter but will projectiles at a templar. To counter balance the threat it poses, it will only spawn in the second half of the campaign as it requires the Rychart mission strand to be completed. Even then, it is an uncommonly spawned enemy due to its potency.
Level 13 profile: 234 HP, 5MP, 31 Arm, 60% Def, Rng 3, 80 Dmg 97% Pen.
Spawn Pit[ | ]
An immobile Terrox that is incapable of dealing damage directly. It instead relies on the other Terrox it spawns to deal damage. Its destruction will reduce the number of reinforcements, and the likelihood of enemy spawning at that location, as Spawn pits can sometimes be found near designated spawn tiles.
Level 14 profile: 240 HP, -MP, 24A, 76% Def.
Spawn Tower[ | ]
An enhanced Spawn pit that is now capable of performing a ranged attack, as well as being able to absorb slightly more damage. As the minimum experience level of the squad rises, this will become the dominant destructible spawning point. It is signified by a red cone like cap, similar to a Lancer. Level 13 profile: 288 HP, -MP, 23 Arm, 74% Def, Rng 4, 70 Dmg 47% Pen.
Objects of Interest[ | ]
Xeno Pod[ | ]
An inert Terrain feature seen on the battlefields of Galantia and Moklumnue Prime. In all cases it is an objective that must be dealt with by a Hydra entering close proximity and dowsing with flames.
Boss Monster[ | ]
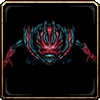
Litch (Rychart Prime)[ | ]
[SPOILER ALERT] - this is a Litch with no stat enhancements but has the ability to indefinitely re-spawn, at a randomly chosen working power amplifier, until all 3 power amplifiers that are spread about the map have been destroyed. It is only after the third amplifier is destroyed that it suffers permanent death. The power amplifiers themselves possess not danger to your squad but can soak up a lot of damage before being destroyed.
Power Amplifier Level 14 profile: 712 HP, -MP, 24A, 75% Def.
Cult of Shelgeroth (Human)[ | ]
The humans you face in game have all been tempted into worshiping Shelgeroth, a Narvidian, through the promise of power by the cult's hierarchy who've acquired illicit xeno artifacts. It is through the delusion that power will be granted to them in exchange for carrying out acts of betrayal, that the cult leaders inspire their followers to carry out a number of atrocities in order to gain favour with their god.
Most of the humans you face will be on Rychart Prime, with some on Leo Major and potentially the Stratos Space Station (depends on which 4th mission is chosen). None of the humans are a match against a templar in a one-on-one fight as they tend to die with 1 hit due to their low HP and poor armour. However their weight of numbers will overcome a heavily out numbered templar, unless the templar is carrying grenades or a flamethrower.
Cultist[ | ]
The core basic soldier of the Human rebels, who is armed with a medium ranged Hex rifle that generally deals minor damage.
Level 14 profile: 39 HP, 5MP, 7 Arm, 10% Def, Rng 5, 50 Dmg 12% Pen.
Flame Trooper[ | ]
A cultist with a short ranged flamethrower that covers 5 tiles. Usually leaves its tile covered in flame on death.
Level 14 profile: 40 HP, 5MP, 7 Arm, 10% Def, Rng 3, 50 Dmg 9% Pen.
Heavy Trooper[ | ]
A cultist with heavier armour and armed with a plasma gun which allows its attacks to penetrate most templar armour with ease. Is more commonly encountered than snipers or rocket cultists.
Level 14 profile: 48 HP, 5MP, 12 Arm, 10% Def, Rng 3, 50 Dmg 70% Pen, 24 Plasma dmg.
Sniper[ | ]
A cultist whose attack has received a significant improvement to armour penetration, as well as a physical damage boost, a range boost, and a huge accuracy boost. Sniper attacks will virtually never miss and can only be avoided by blocking. Is visually similar in appearance to a soldier, only the longer barrel length distinguishes the two apart.
Level 14 profile: 39 HP, 5MP, 7 Arm, 10% Def, Rng 5, 70 Dmg 64% Pen.
Rocket Cultist[ | ]
A slower moving cultist that has the largest health pool and armour deflection of the rebel forces, but only fires once per turn. Potential for their attack to have a 5 or 9 tile area of effect.
Level 14 profile: 59 HP, 3MP, 7 Arm, 16% Def, Rng 4, 50 Dmg 35% Pen.
Heavy Machine Gun Turret[ | ]
An immobile gun emplacement. It is capable of dealing reasonable damage to a templar. Commonly placed at a choke point, with overlapping fire arcs from one or more other HMG turrets to catch unsuspecting targets in a crossfire. Its weakness is its attack range of 4, which allows most ranged templar to safely engage without taking damage.
Level 14 profile: 205 HP, -MP, 20 Arm, 37% Def, Rng 4, 90 Dmg 53% Pen.
Security Cannon[ | ]
An immobile gun emplacement found on the Stratos space station. These highly dangerous range 6 turrets can sometimes be remotely destroyed either by activating a switch located elsewhere in the level, or by having accessed a command centre panel in a certain mission. They are best avoided where possible as they will easily destroy a templar in one turn, otherwise it is best to minimize the number of templars within its range of fire, as it can fire twice per turn.
Level 13 profile: 809HP, -MP, 26 Arm, 93% Def, Rng 6, 130 Dmg 100% Pen.
Level 29 profile: 1020HP, -MP, 29 Arm, 103% Def, Rng 6, 160Dmg 122% Pen
Objects of Interest[ | ]
Faster-Than-Light Relay[ | ]
[SPOILER ALERT] Objective for the final Leo Major mission. It is a high-tech radio transmitter with the sole aim of sending out 5 broadcasts to the Narvidians; it broadcasts at predetermined intervals. It is immobile and incapable of dealing damage, but is protected by an external energy field that must be brought down in order to destroy it.
Level 15 profile: 736 HP, -MP, 25A, 76% Def.
Faction Soldier[ | ]
For comparison with the Human rebels, the full profile of a loyal Faction Soldier is included as they are armed allies who join your forces during the first half of the Moklumnue Prime missions. They will be the same level as a new templar recruit would be; they can not have their armament changed; they do not build up heat and are worth +5XP for each one who survives the mission. They are required to work as a team to take down a Scittering in one turn and usually struggle to injure a regular Hunter; unfortunately they can be killed in one hit by a Scittering.
Level 20: 58HP, 5MP, 5AP, Fortitude 3, Willpower 2, Focus 2, Strength 3, Quickness 2, Gunnery 2, Warrior 1, Tactics 2, Evasion 2. Talent - Semi-Auto Fire 1 (akin to burst fire) range 4, 2AP, 0 Heat, +4 Accuracy, +2 Dmg, +5% Crit chance. Their attack is 11-42 Dmg, 12% pen, 7% Crit chance with 8str +5reg dice for accuracy (includes all bonuses).
Narvidians[ | ]
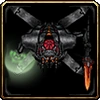
The Narvidians are a race of mechanical spider like beings with a hive consciousness. Due to this collective mind they are a species where there is no room for self awareness and individual thought. In the event that the influence of the hive mind is disrupted, they lose their sense of cohesion and become easier to defeat in battle.
It is their desire to control other species that lead to the humans to seek a new home far away from the Narvidian controlled space, after humanity accidentally came into contact with them through faster than light communication technology. Their desire to control all races they encounter, combined with their knowledge of genetic manipulation has also lead to the creation of some of the Terrox units such as the Litch.
In game they are the last race you'll encounter and in comparison to the Terrox: are slightly slower moving; spawn at a slower rate due to unit cost; have higher HP to the Terrox equivalent; their attacks have medium to high penetration and deal two damage types when they attack.
Hawk-Seeker[ | ]
Best considered as a mechanical version of the Radiated Scittering, as they are small, quick moving and comparatively soft targets.
Level 15 profile: 129HP, 6MP, 50 Arm, 44% Def, Rng 1, 60 Dmg 70% Pen. 40 Rad Dmg.
Radiated Hawk-Seeker[ | ]
A green coloured variant of the hawk-seeker that deals greater radiation damage.
Radiator[ | ]
A mechanical equivalent to the Spitter, this Narvidian is equipped with a single shot rifle that deals additional radiation damage.
Level 15 profile: 260HP, 4MP, 38 Arm, 71% Def, Rng 5, 60 Dmg 55% Pen. 36 Rad Dmg.
Warrior[ | ]
A mechanical equivalent to a Plated Hunter/Predator hybrid, this Narvidian is equipped with a shield and powerful melee weapon that deals minor additional radiation damage.
Level 15 profile: 363HP, 4MP, 38 Arm, 110% Def, Rng 1, 120 Dmg 69% Pen. 20 Rad Dmg.
Flamespider[ | ]
A Narvidian equipped with a flamethrower that covers 5 tiles on a successful hit; it can not perform attacks that automatically cover an area in fire, like Napalm Lance. It leaves a fireball that covers the square it was on when killed. It is the only Narvidian that deals additional damage through fire instead of radiation.
Level 15 profile: 260HP, 4MP, 45 Arm, 107% Def, Rng 3, 70 Dmg 55% Pen.
Boss Monsters (SPOILERS)[ | ]
War Worm[ | ]
A monster that appears at the end of the Moklumnue Prime mission strand. It appears on screen as you approach the centre of the map and must be seriously injured (lose all displayed HP) 3 times during the battle to kill it. Beware it has a powerful range 5 attack that will quickly slaughter templars that get too close (but it only attacks once per turn). It is far safer to use range 6+ attacks against it.
Level 15 profile: 832HP, -MP, 50 Arm, 95% Def, Rng 5, 90 Dmg 104% Pen. 78 Rad Dmg.
Narvidian Widow[ | ]
An enhanced Narvidian warrior that must be assassinated during the final chapter when repelling the Narvidians from the Righteous Fallen. It only joins the battle after 8 turns have passed. Its visual appearance is almost identical to a regular warrior, with the shape of the melee weapon being the main difference.
Level 15 profile: 832HP, 5MP, 41 Arm, 115% Def, Rng 1, 120 Dmg 76% Pen. 20 Rad Dmg.
Energy Conduit[ | ]
An immobile, non-lethal mechanical construct that forms part of the hive ship's command centre and is destructible. Its destruction deals 375 HP of damage to the Hive Mind, irrespective of the Hive minds vulnerability status, at all experience levels. There are 7 conduits distributed across the map.
Level 15 profile: 736 HP, -MP, 25A, 76% Def.
Hive Worm[ | ]
Immobile biological turret bodyguards for the final boss. They have a powerful range 5 attack that will quickly take a templar down. Range 6+ Soldiers, Neptunes and Scouts can defeat a worm in 3 turns with concentrated fire and the right set of talents. At least 1 of the hive worms must be killed during the final battle in order to be able to deal sufficient damage to the Hive Mind. The worm's death removes the Hive Mind's invulnerability to damage for 2 turns per worm killed but does not deal any feedback damage; the turn counter starts the turn the worm dies. There are 7 worms distributed across the map.
Level 15 profile: 832HP, -MP, 50 Arm, 78% Def, Rng 5, 90 Dmg 73% Pen. ? Rad Dmg.
Hive Mind[ | ]
The driving force that motivates the Narvidian Fleet to attack your new home worlds. This is the final boss of the main campaign, so expect a long fight. It is immobile, has a vast health pool even at low experience levels (expect in the region of 3500-5000 HP), can not be damaged except under certain conditions and has a powerful short ranged attack to discourage melee attacks when vulnerable. Avoid leaving anything directly to the left of its head, unless you want to see it destroyed quickly as it is also capable of a ranged attack.
Level 15 profile: 4680HP, -MP, 50 Arm, 95% Def, Rng 1, 120 Dmg 52% Pen. 78 Rad Dmg.